# Deploying to Vercel from an organization for free using GitHub actions
# Introduction
These are my notes in my experience when reading and reproducing the following articles:
- Deploying to Vercel from an organization for free using GitHub actions (opens new window)
- Nextjs CI/CD on Vercel with Github actions (opens new window)
- Here is the GitHub Action repo: amondnet/vercel-action (opens new window)
# repo, branches and tree
➜  nextra-casiano-rodriguez-leon-alu0100291865 git:(guide) git remote -v
origin  https://github.com/ULL-MII-SYTWS-2425/nextra-casiano-rodriguez-leon-alu0100291865.git (fetch)
upstream        https://github.com/ULL-MII-SYTWS-2425/ull-mii-sytws-2425-nextra-nextra-docs-template.git (fetch)
➜  nextra-casiano-rodriguez-leon-alu0100291865 git:(guide) git -P branch -a
  allrepos
  auth
  auth2024
  dmsi20241028
* guide
  loading-message
  main
  middleware
  remotes/origin/HEAD -> origin/main
  remotes/origin/allrepos
  remotes/origin/auth
  remotes/origin/guide
  remotes/origin/main
  remotes/upstream/main
➜  nextra-casiano-rodriguez-leon-alu0100291865 git:(guide) tree -I screeenshot.png .github
.github
└── workflows
    └── deploy.yml
2
3
4
5
6
7
8
9
10
11
12
13
14
15
16
17
18
19
20
21
22
# Vercel cli
Was installed with node version 20.5.0 and npm version 9.8.0:
➜  apuntes-pl git:(main) nvm use v20
Now using node v20.5.0 (npm v9.8.0)
➜  docs git:(main) vercel --version
Vercel CLI 39.1.3
39.1.3
2
3
4
5
# The solution
The idea is to use GitHub actions as our CI and deploy the project through your personal (hobby) subscription via the Vercel CLI (opens new window). All we need to do locally is to create and link the project to Vercel.
Install the Vercel CLI by running
npm i -g vercel
Once the Vercel CLI is installed, you need to log in to your Vercel account. Run the following command:
vercel login
This will prompt you to authenticate:
➜  apuntes-pl git:(main) vercel whoami
Vercel CLI 39.2.6
> casiano-rodriguez
➜  apuntes-pl git:(main) vercel login
Vercel CLI 39.2.6
? Log in to Vercel (Use arrow keys)
❯ Continue with GitHub
  Continue with GitLab
  Continue with Bitbucket
  Continue with Email
  Continue with SAML Single Sign-On
 ─────────────────────────────────
  Cancel
2
3
4
5
6
7
8
9
10
11
12
13
If we choose GitHub, we will be asked to authenticate with GitHub:
? Log in to Vercel Continue with GitHub
> Success! GitHub authentication complete for crguezl@ull.edu.es
Congratulations! You are now logged in. In order to deploy something, run `vercel`.
💡  Connect your Git Repositories to deploy every branch push automatically (https://vercel.link/git).
➜  apuntes-pl git:(main) vercel whoami
Vercel CLI 39.2.6
> crguezl
2
3
4
5
6
7
In your project directory, link the project to Vercel by running
vercel
As scope use your own username
The CLI will prompt you about project details;
- when asked for a deployment scope, choose your own username.
This should initialize the project on Vercel under your personal account, and automatically detect and configure the framework and build presets.
After successfully initializing a project, the CLI will create a .vercel directory containing a generated project.json that looks something like this:
{"orgId": "...", "projectId": "..."}
This will give you the orgId and projectId needed to deploy the project via the CLI!.
# .github/workflows/deploy.yml
The GitHub action is defined in the file .github/workflows/deploy.yml. It needs the secrets
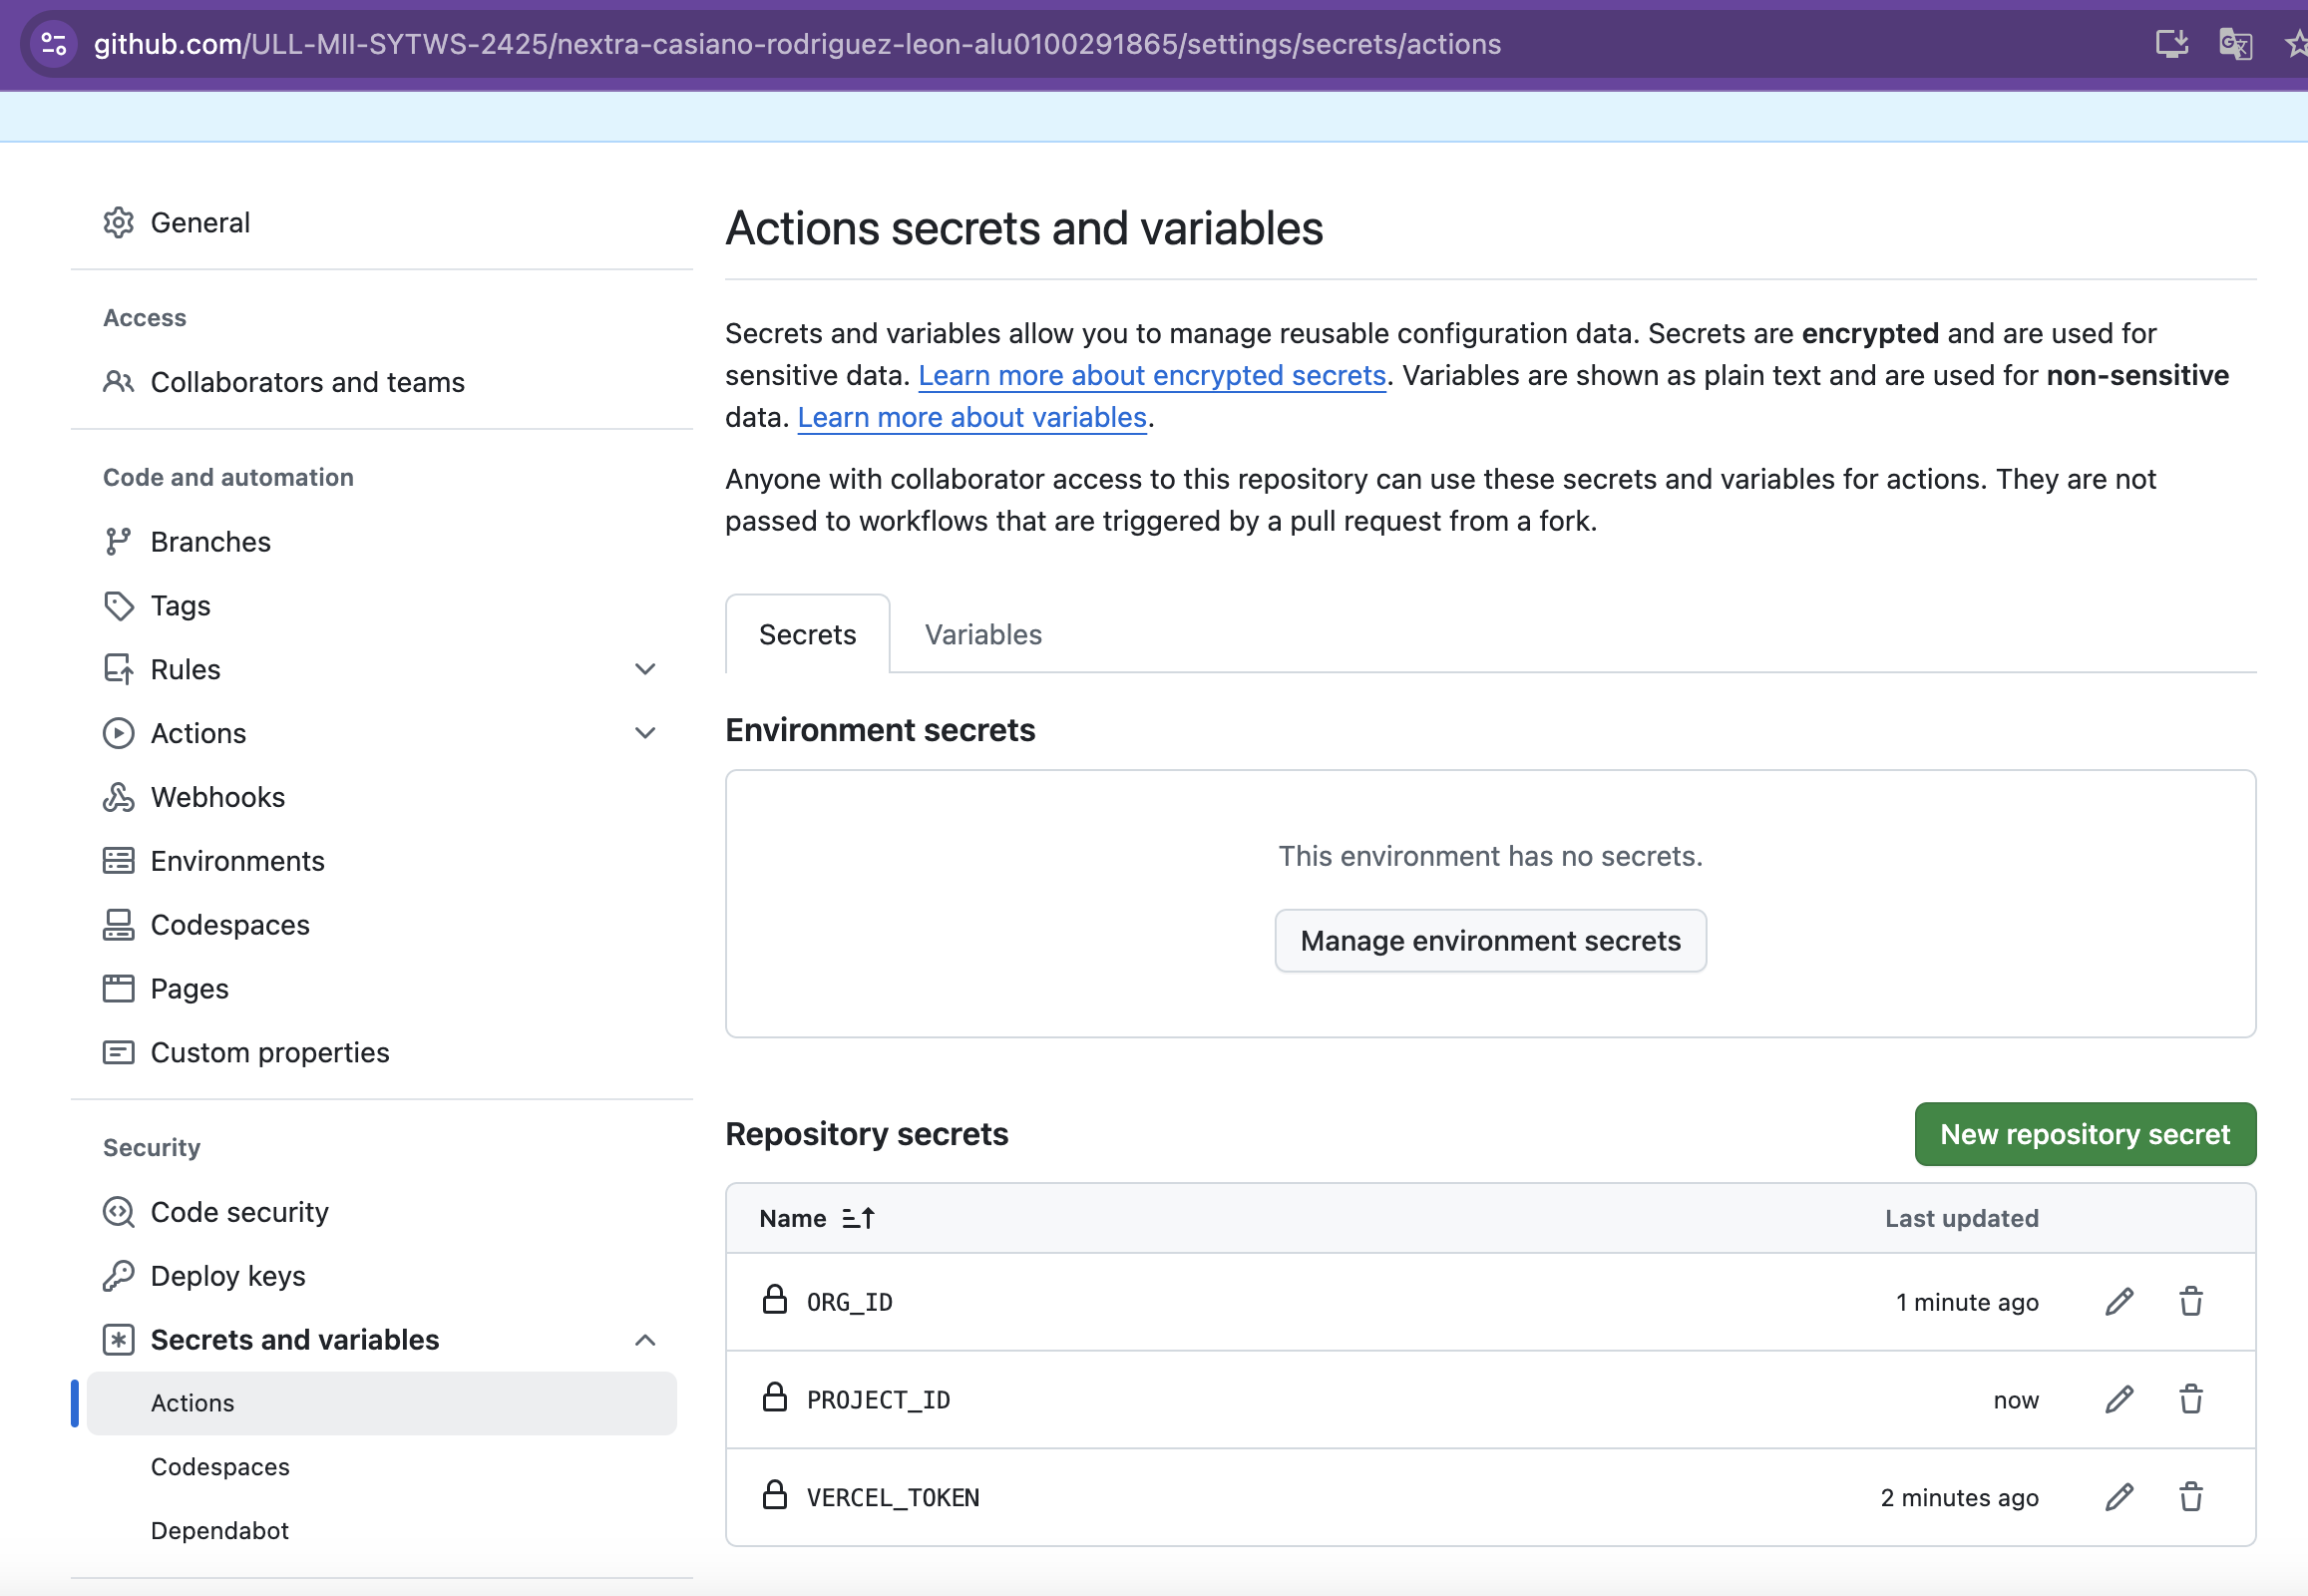
ORG_ID and PROJECT_ID that were obtained before and will be stored as secrets in the repository settings.
➜  nextra-casiano-rodriguez-leon-alu0100291865 git:(guide) cat .github/workflows/deploy.yml
# vercel-merge.yml
name: Deploy to vercel on merge
on:
  push:
    branches:
      - guide
jobs:
  build_and_deploy:
    runs-on: ubuntu-latest
    steps:
      - uses: actions/checkout@v4
      - uses: amondnet/vercel-action@v20
        with:
          vercel-token: ${{ secrets.VERCEL_TOKEN }}
          github-token: ${{ secrets.GITHUB_TOKEN }}
          vercel-args: '--prod'
          vercel-org-id: ${{ secrets.ORG_ID}}
          vercel-project-id: ${{ secrets.PROJECT_ID}}
2
3
4
5
6
7
8
9
10
11
12
13
14
15
16
17
18
19
# VERCEL_TOKEN
After you've logged in, you can create an access token by navigating to your Account Settings on the Vercel website. Here's how:
- Go to https://vercel.com/account/tokens (opens new window)
- Click on the "Create" button to open the create token modal
- Enter a descriptive name for your token
- Choose the scope of access for the token from the dropdown
- Click "Create Token"
- Once created, make sure to copy the token immediately. It will only be shown once for security reasons .
- You can now use this token in your deployment scripts or CI/CD pipelines. For example, you might set it as an environment variable named
VERCEL_TOKEN.
Here's an example of how you might use these in a deployment script:
vercel pull --yes --environment=production --token=$VERCEL_TOKEN
vercel build --prod --token=$VERCEL_TOKEN
vercel deploy --prebuilt --prod --token=$VERCEL_TOKEN
2
3
This script pulls the latest environment variables, builds the project, and deploys it to production .
# Secrets
To set the secrets go to the repository settings and click on the secrets tab.
Choose actions and add the following secrets:
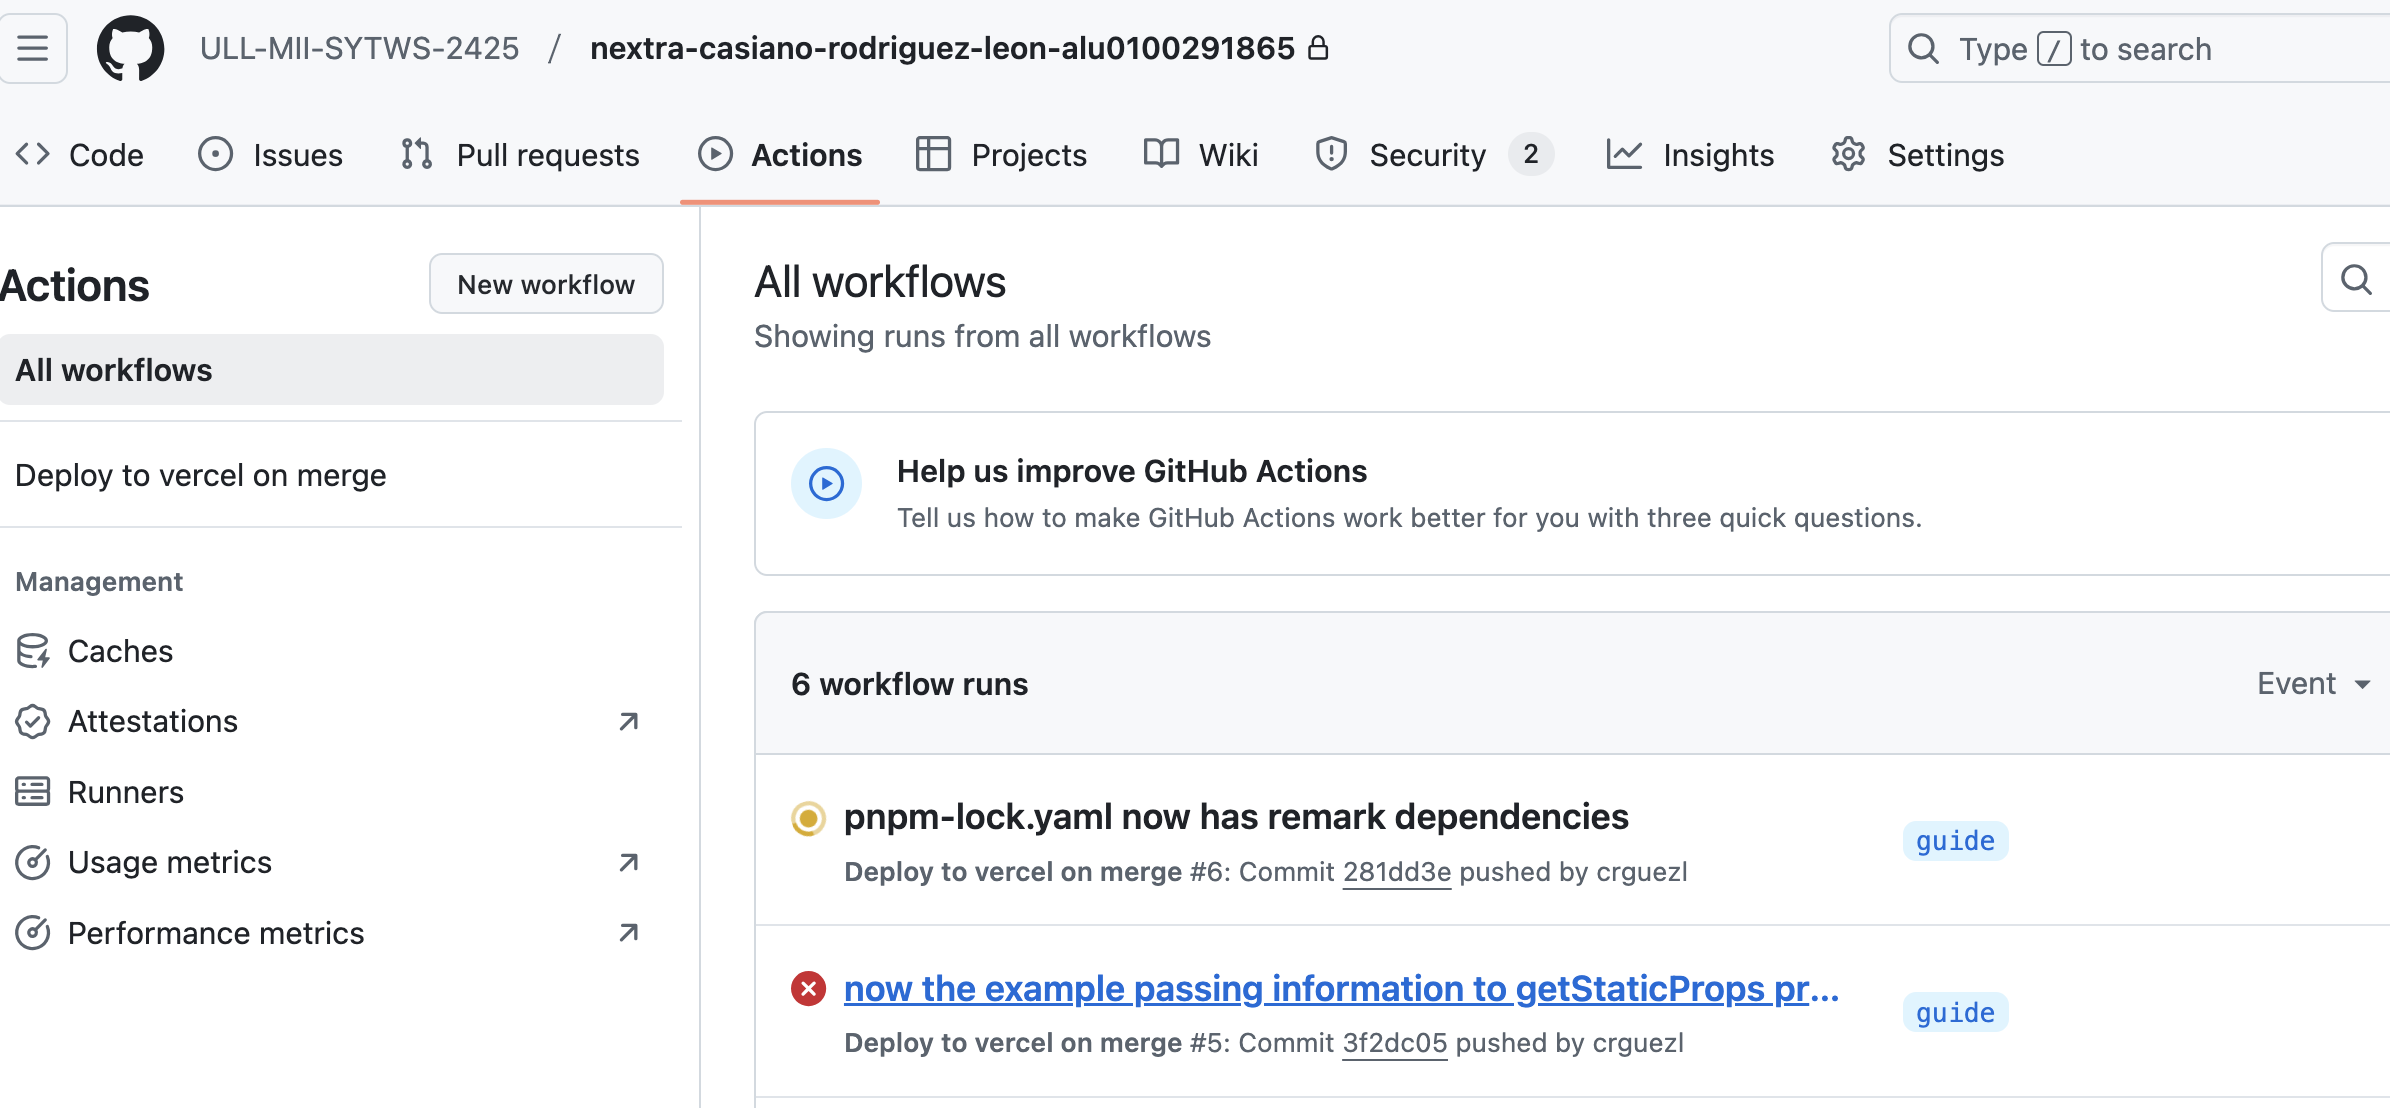
# The workflow running in GitHub
# Errors and Fixing them
The building finishes, but after it, there is a warning followed by an error:
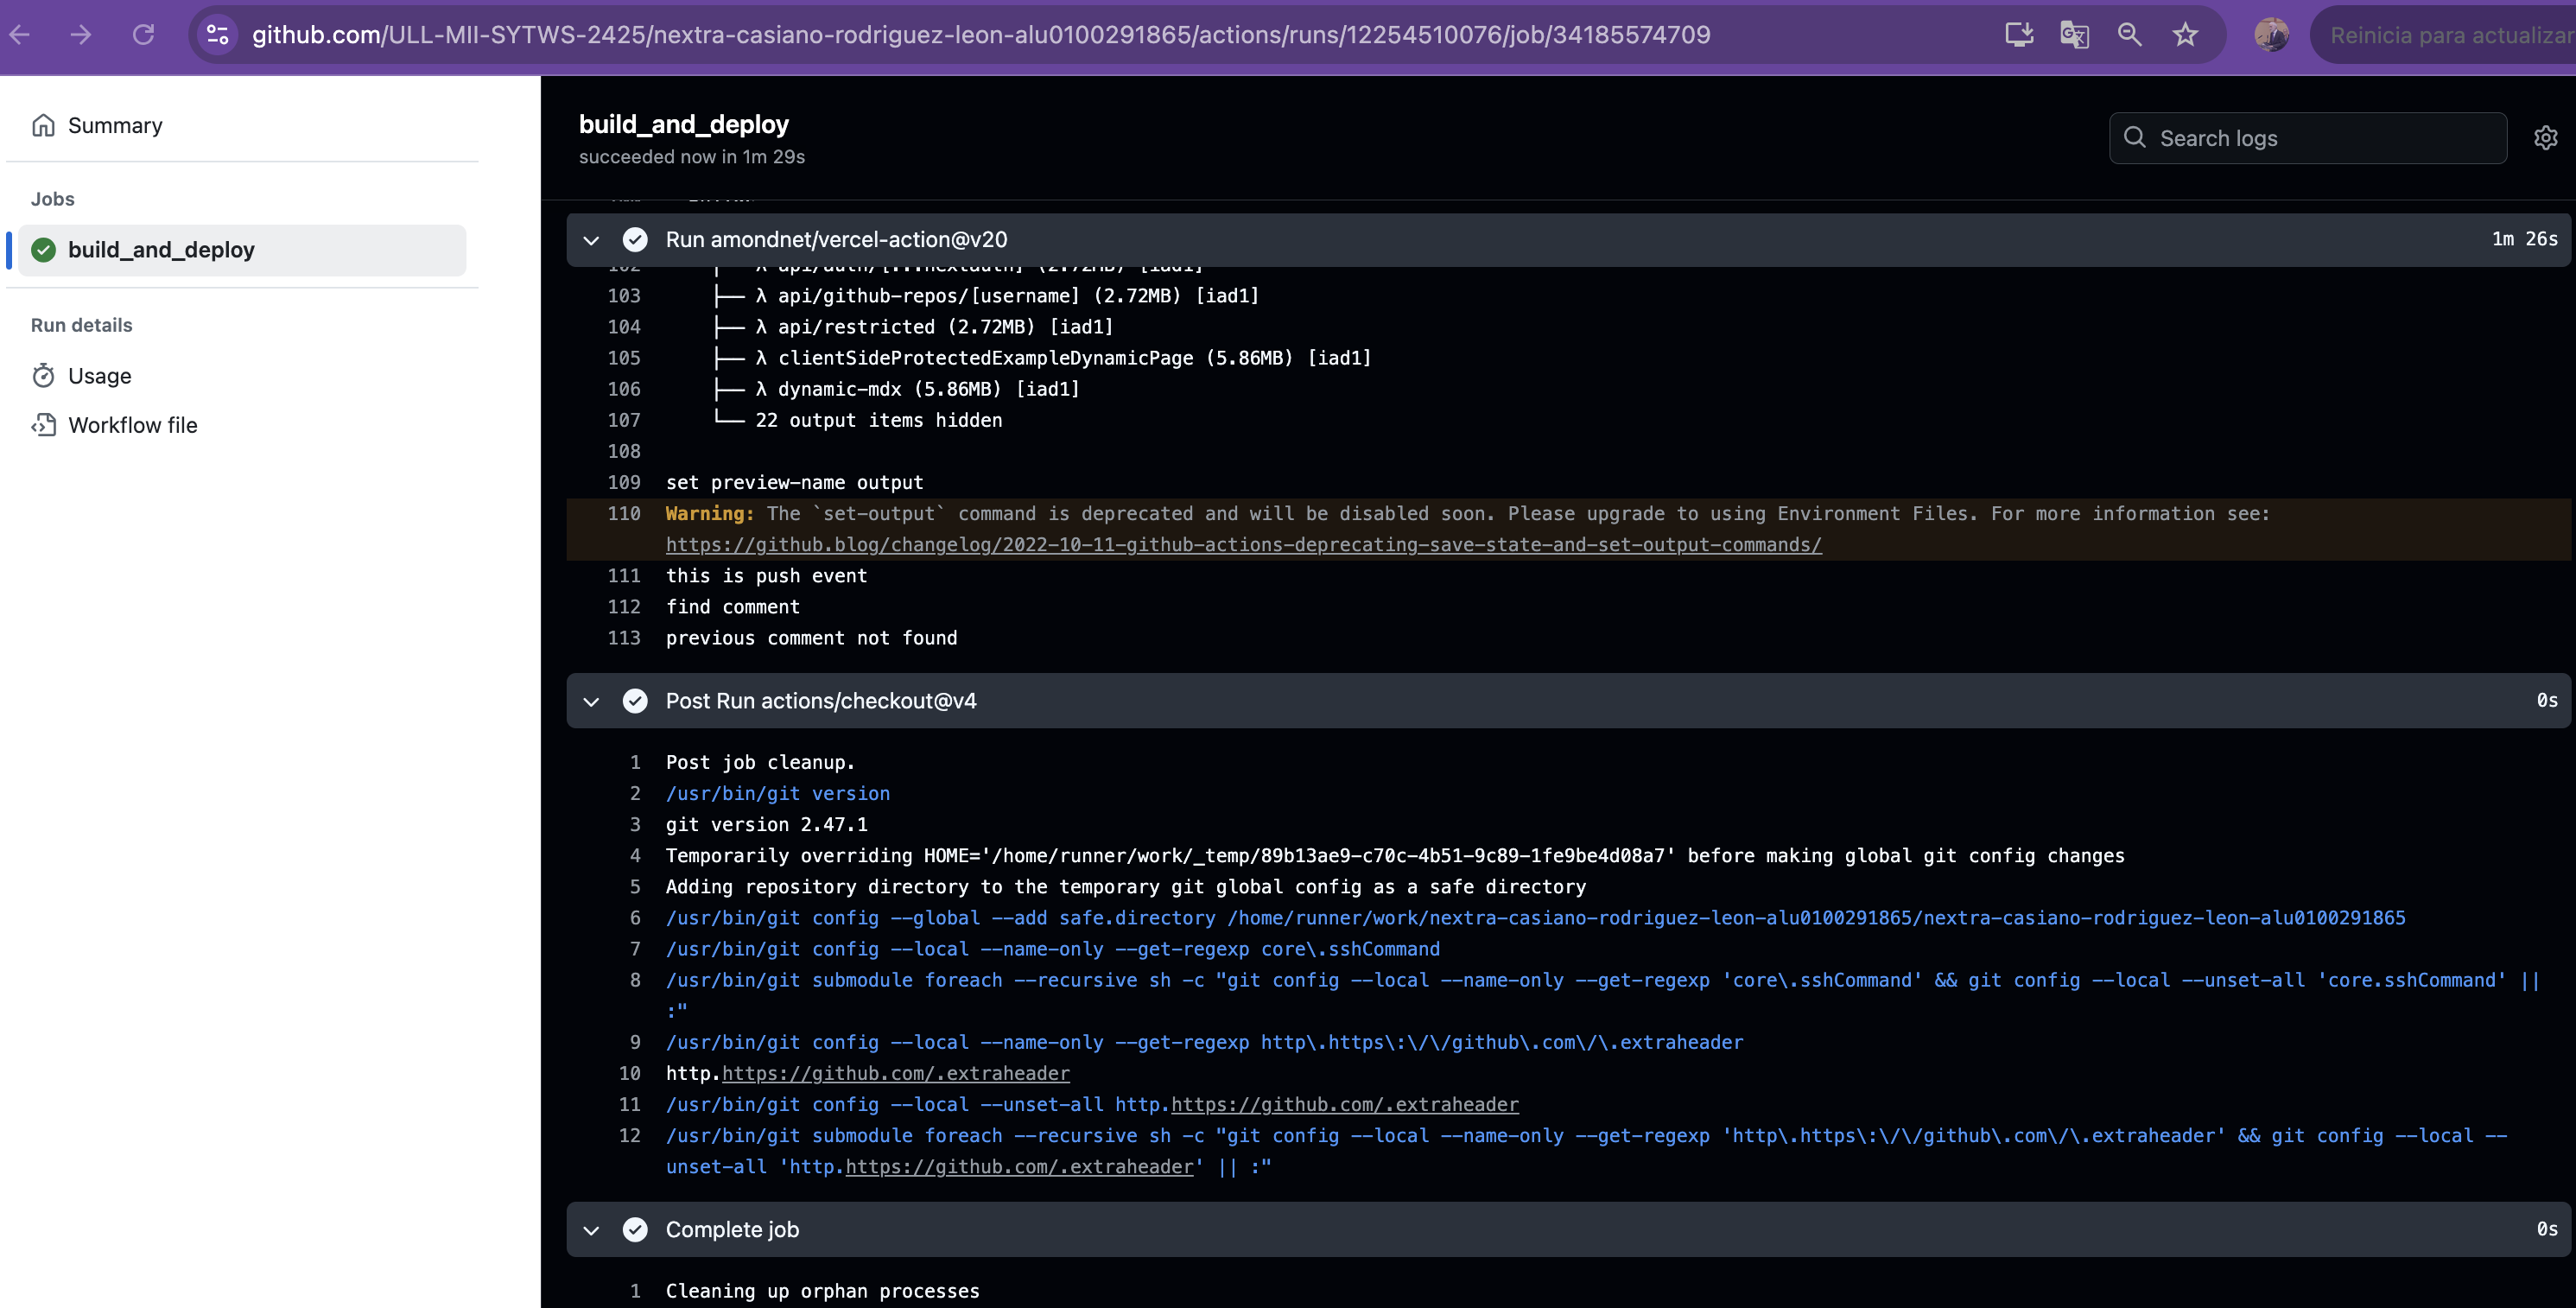
Warning: The `set-output` command is deprecated and will be disabled soon.
Please upgrade to using Environment Files.
For more information see:
https://github.blog/changelog2022-10-11-github-actions-deprecating-save-state-and-set-output-commands/
this is push event
find comment
previous comment not found
Error: Resource not accessible by integration
2
3
4
5
6
7
8
See the following issues at the action repo:
- issue set-output command warning #217 (opens new window) a
- issue Resource not accessible by integration #235 (opens new window)
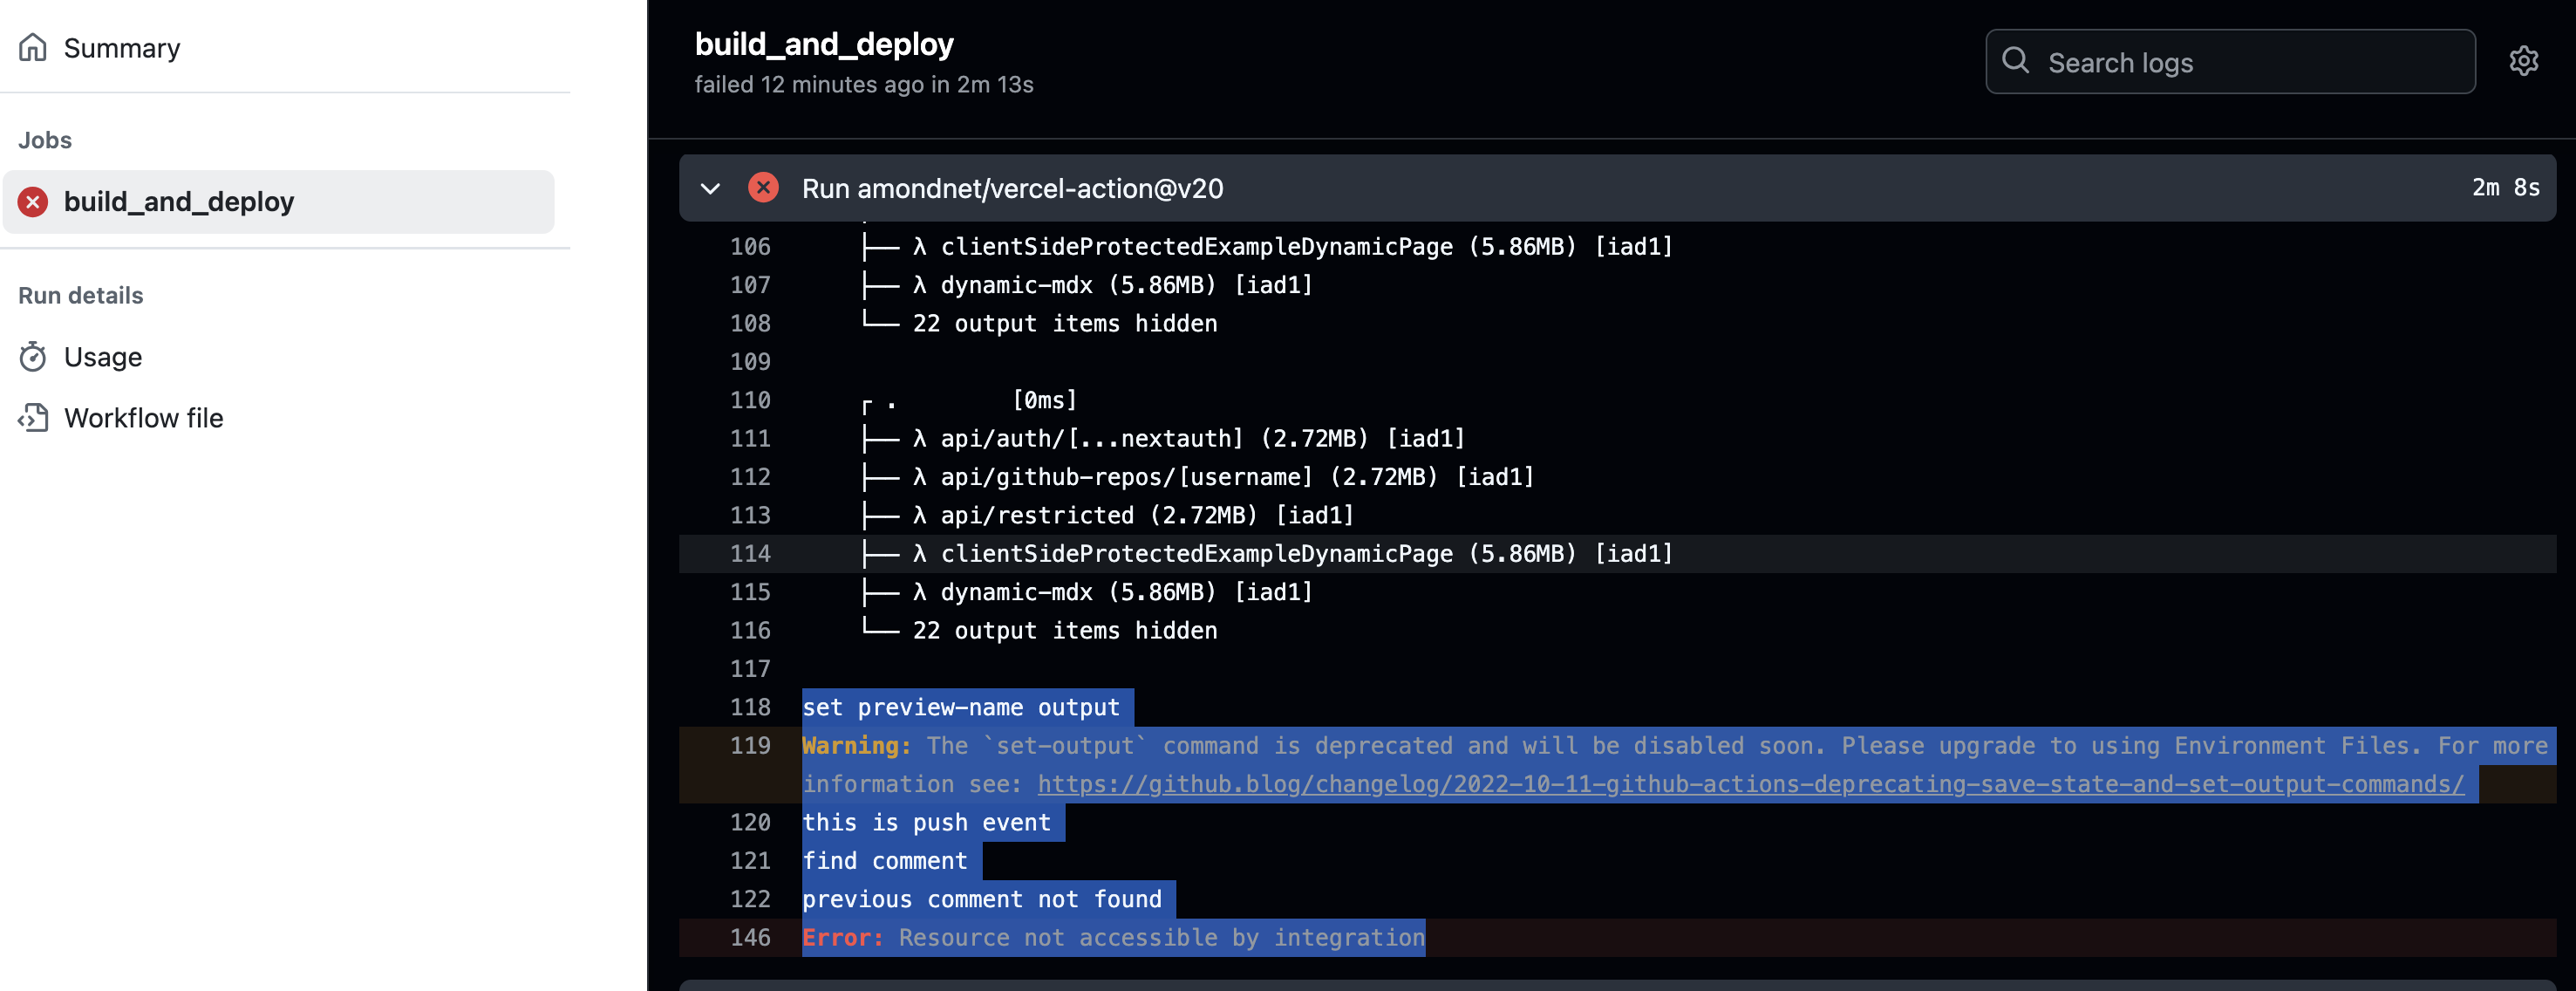
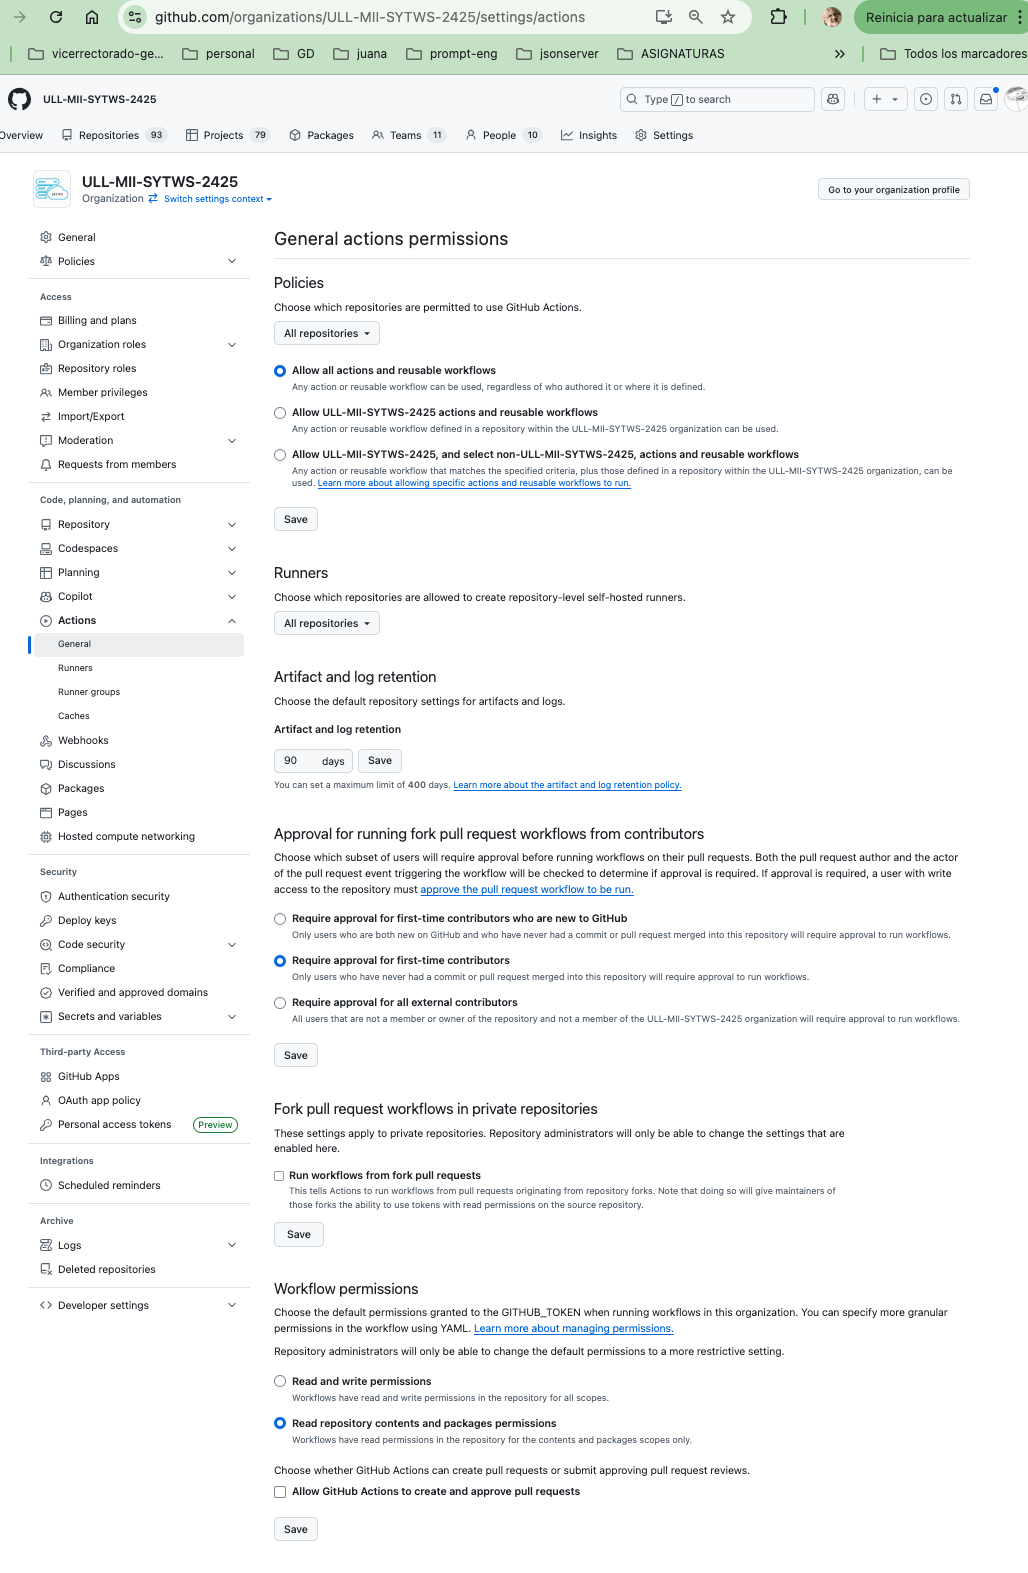
You need to grant both read and write permissions for the workflows in the repository and the organisation, if the repo is part of one. See this topic: https://github.com/orgs/community/discussions/21061 (opens new window)
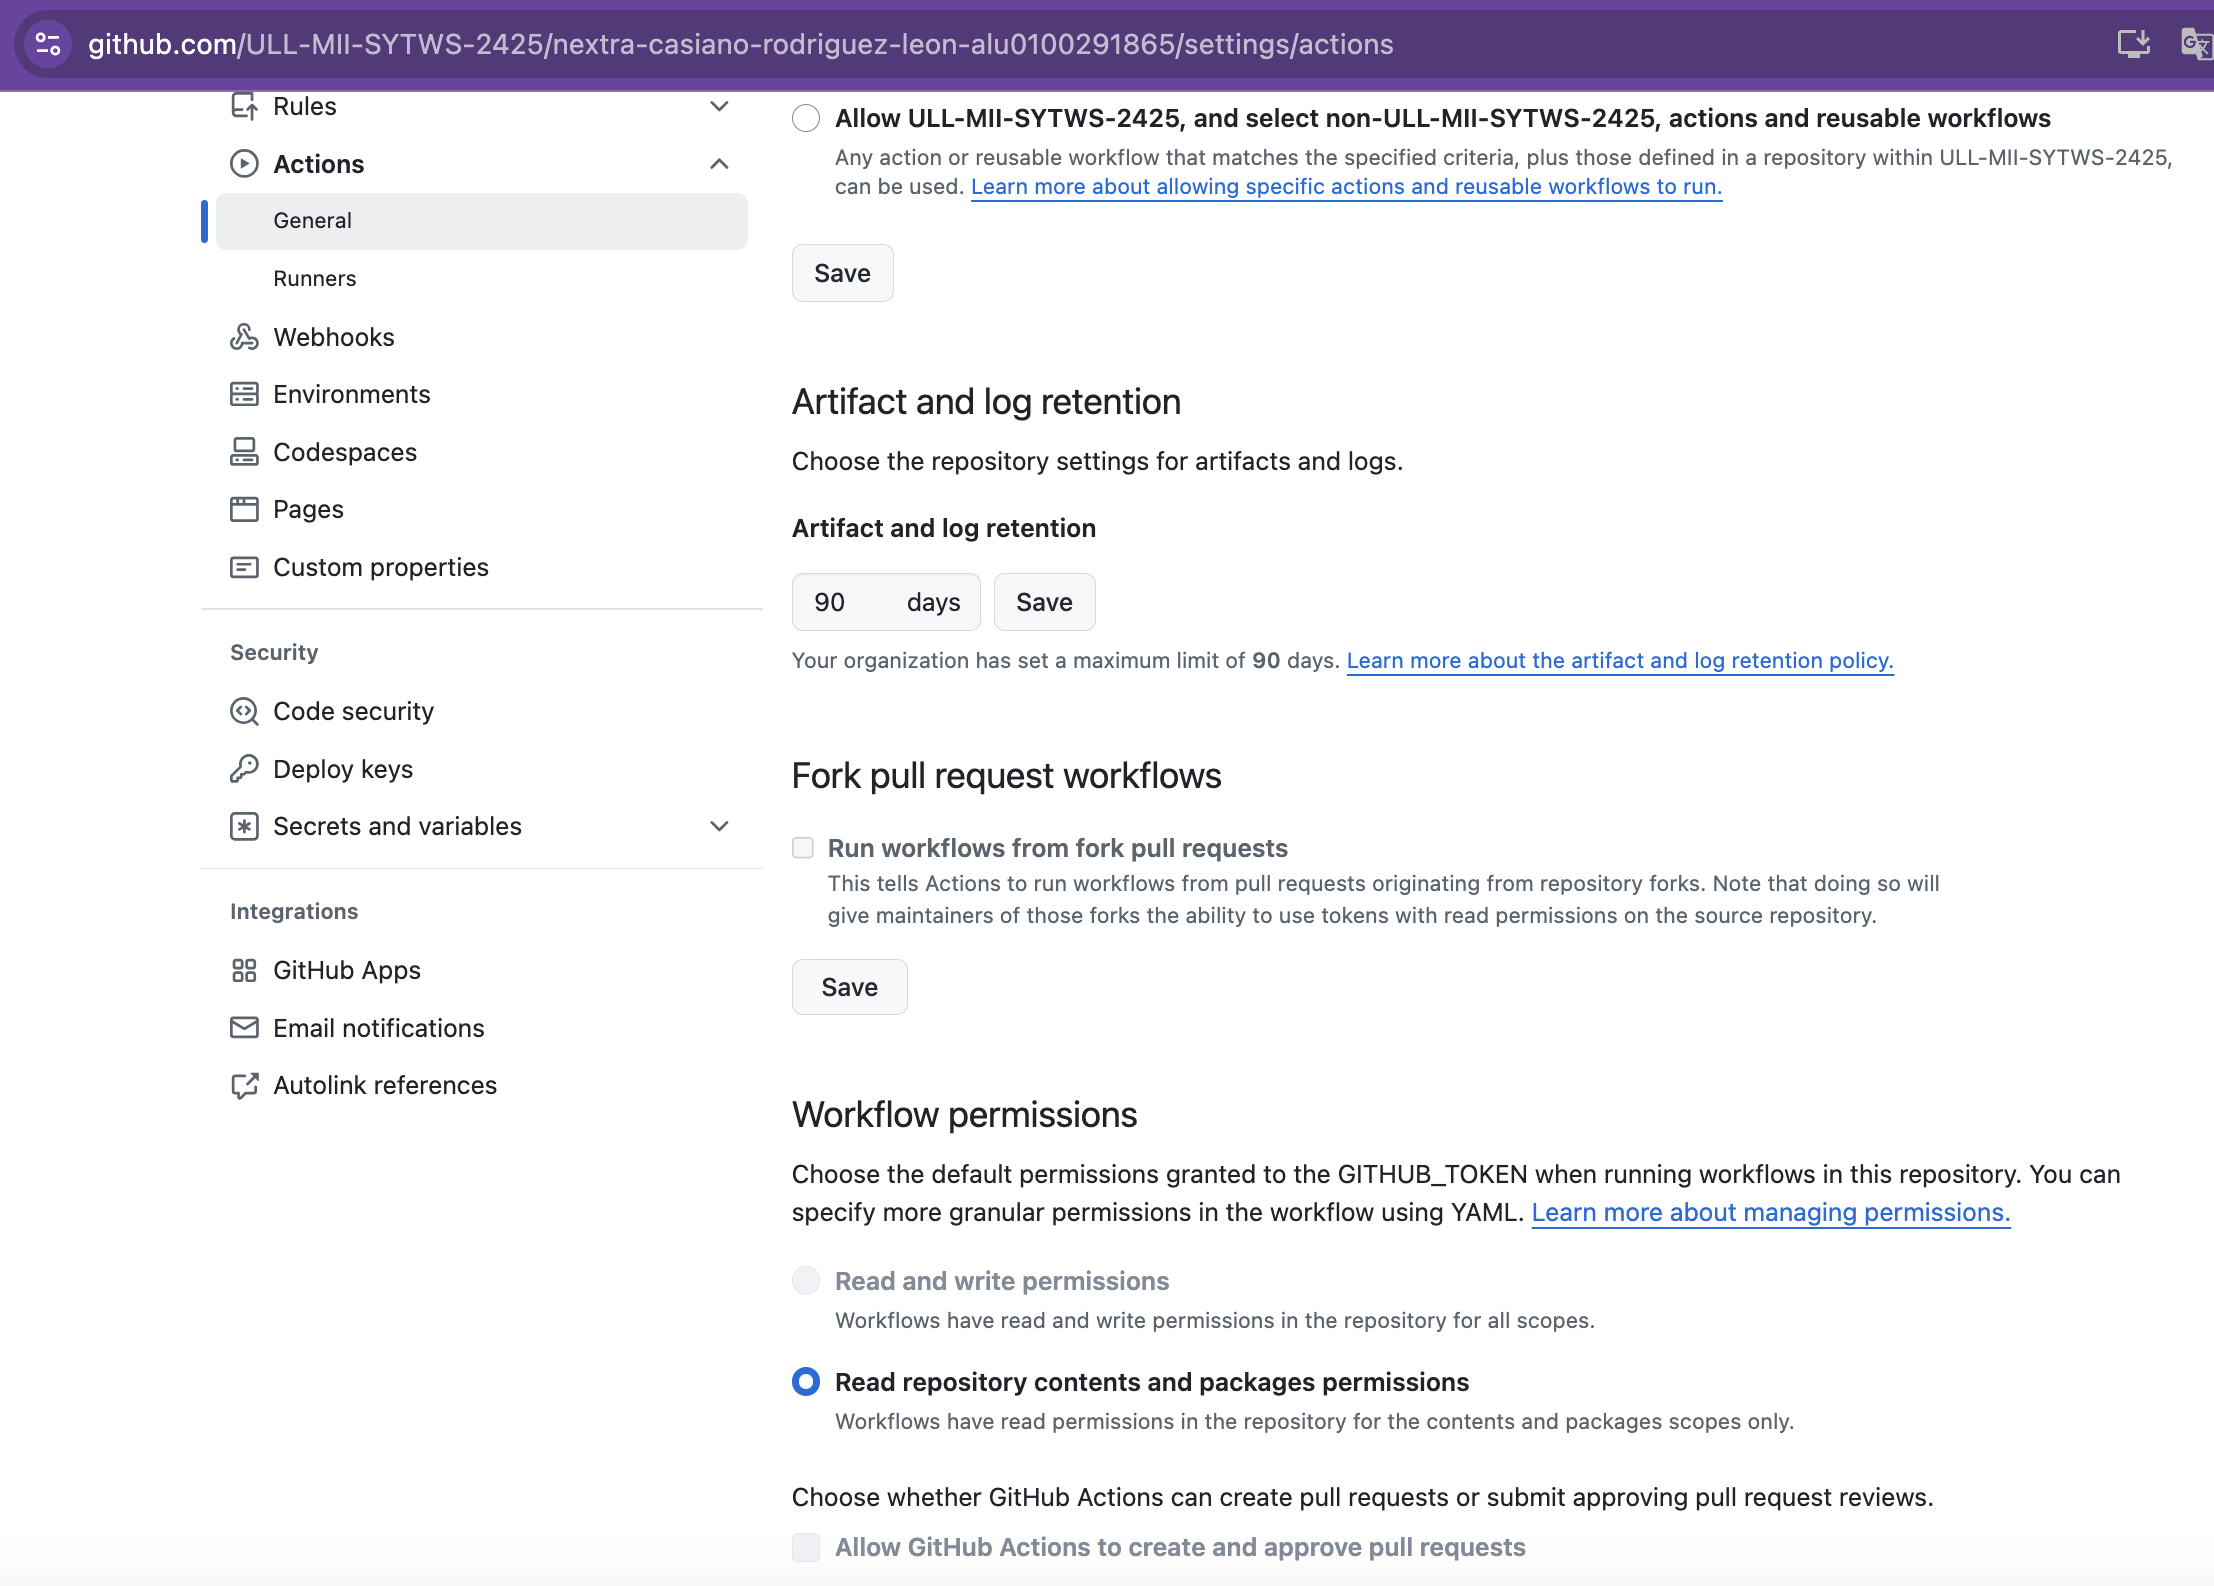
The change must be done by an owner of the organization:
Once it is done, the action runs successfully:
# See also
- Section Deploy to vercel your Next.js App in this notes